Cordless Drill Batteries
- Bosch Cordless Drill Battery
- Makita Power Tool Batteries
- Dewalt Power Tool Battery
- Milwaukee Cordless Drill Battery
- Dyson Vacuum Cleaner Battery
- Ryobi Power Tool Battery
- Panasonic Cordless Tool Battery
- Black & Decker Drill Batteries
- Paslode Power Tool Battery
- Hitachi Cordless Drill Batteries
- AEG Power Tool Batteries
- Metabo Drill Batteries
- Worx Power Tool Battery
- Irobot Vacuum Batteries
- Dremel Cordless Drill Battery
- Drill Battery Charger
Top Sale Drill Batteries
Homemade Cordless Drill Battery Charger
In this article you will find step-by-step instructions on how to build a battery charger from wood scraps that will allow you to charge a NiCd (ni'-cad) cordless drill battery.
** WARNING ** only NiCd (Nickel Cadmium) batteries may be charged using this method. The pack type is usually written on them. Many newer drills use other types of batteries (Li-Ion, NiMh) that WILL EXPLODE IF YOU USE THIS PROCEDURE. If you are unsure, do not attempt this instructable. Also, improper construction or calculation of component values can cause the batteries to CATCH FIRE or EXPLODE.
Cut Two Wooden Blocks to Hold the Battery Pack in Place.
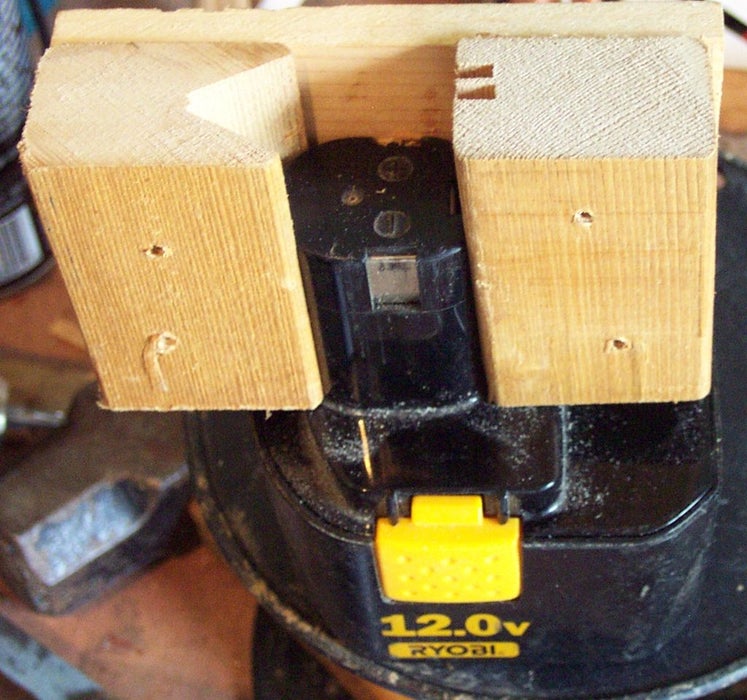
First measure the thickness of the stem on the battery pack and rip two wooden blocks to the same thickness. Then, make a v shaped groove to accept the rounded part of the battery pack. Make the second block with grooves to accept any keying bosses (ribs) the manufacturer may have added to the pack. I found it was easy to press the wood hard against the battery pack and use the dents as a guide for putting the slots in with my table saw. The two block can then be held in place and traced on a thin piece of wood that will become the side. Screw the side to the two blocks and test fit them.
Cut a Second Side for Your Battery Holder
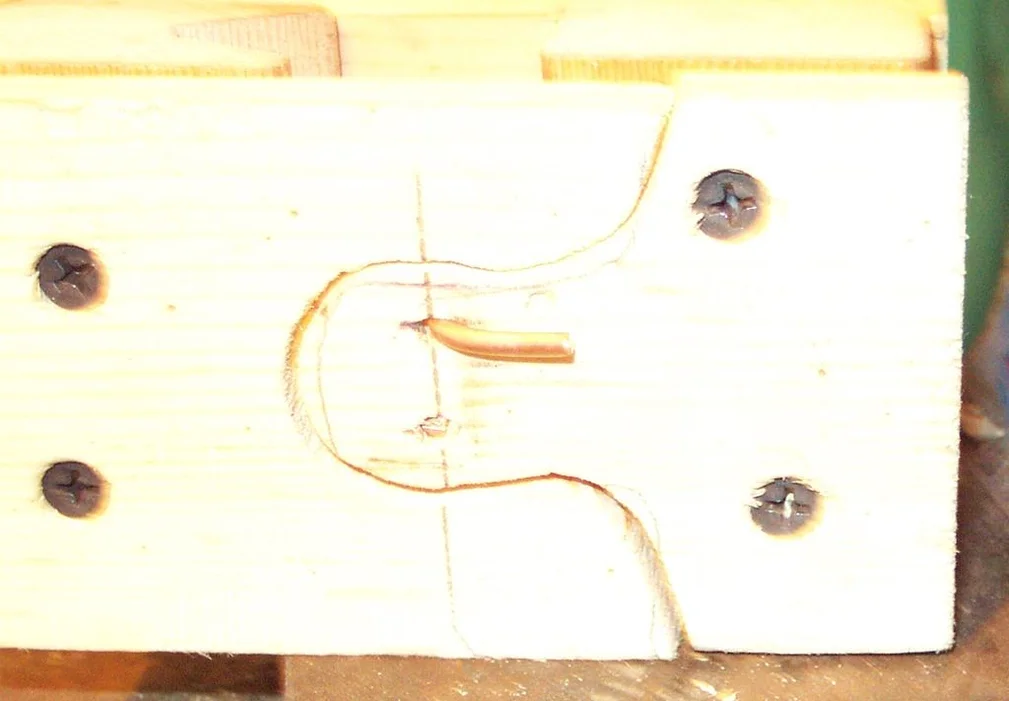
Cut a second side from a thin piece of wood. The thinner, the better. It will be flexed when the battery pack is inserted. Cut a relief or leave out two of the screws so that the wood will bend a little when the contacts slide in. The puzzle piece shape isn't required, but it makes it easier to cut on a bandsaw. It does allow prongs of material to come from both sides that can flex out of the way as the pack is inserted.
Add Copper Contacts to Your Battery Holder
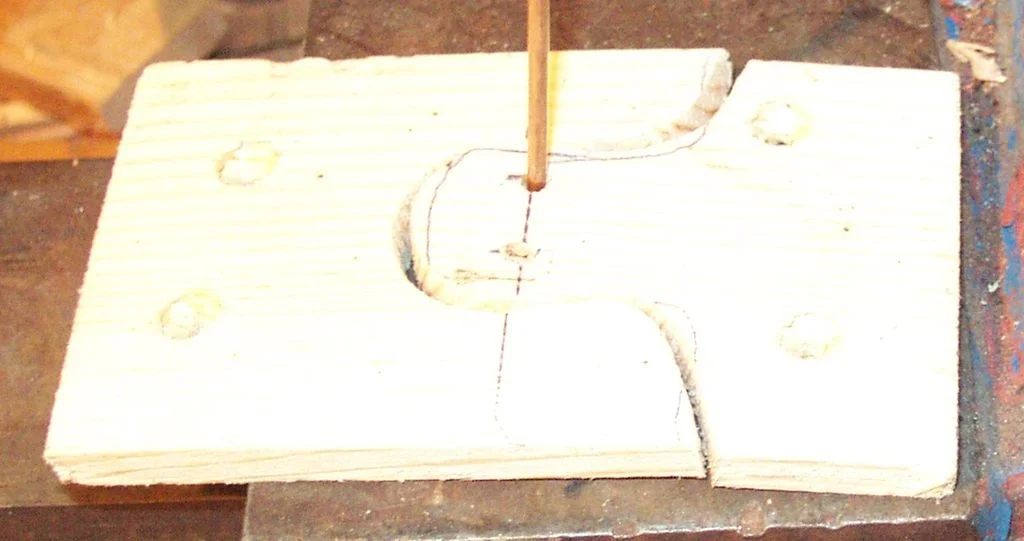
The battery holder needs a pair of copper contacts. I used #10 solid copper wire from a piece of type NM cable commonly used for residential wiring. Mark a pair of holes at the top and bottom edge of your battery contacts for the positive and negative battery terminals. Next, strip all of the insulation off the wires. Then I bent it into a U shape so that the U was inside of the holder and the wire stuck out. Insert it into the pair of holes. The wires should touch the terminals on the Bosch power tool battery. A volt-meter can be used to check that this is working.
Screw on Both Sides of the Battery Holder
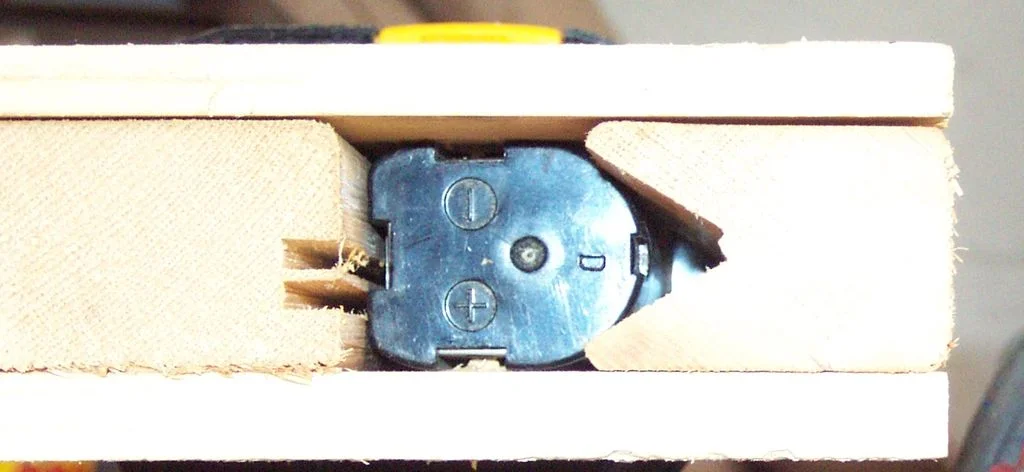
The battery holder should sandwich the battery pack stem. The contacts should touch both of the battery pack terminals. My pack was tapered, and so the blocks are not square with the ends. I clean up the ends when I finished with the table saw.
Build the Circuit.
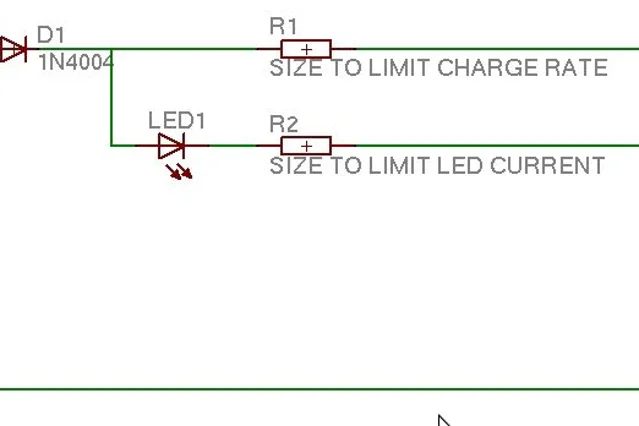
A diode, an LED, and a few resistors are required to make sure the battery pack is charged at a safe rate. If you have any doubts on how to do this, consult an expert on the topic or quit. MISTAKES IN SELECTING COMPONENTS CAN START A FIRE. THIS COULD BURN DOWN YOUR HOUSE, PERHAPS SETTING OFF A CHAIN REACTION OF FIRES THAT BURNS DOWN YOUR WHOLE TOWN. BATTERY PACKS WILL ACCEPT EXCESS CHARGE CURRENTS WHILE REMAINING COOL UNTIL THEY ARE FULL--AT THAT POINT THEY WILL START TO OVERHEAT AND MAY CATCH FIRE OR EXPLODE. I used an AC output pack, so the charger outputs effectively half that of a DC wall transformer. I aimed for a nice, slow 1/16th C charge rate (capacity divided by 16). Because mine is an AC output transformer, I had to double that to 1/8th. Use 1/16 in the math for DC chargers, or it will kill your packs or maybe start your house on fire.
1.6Amp hour capacity / 8 = 0.2A charge rate.
The nominal voltage of a fully charged NiCd cell is 1.2V. So for 12V my pack needs 10 cells. (12V/1.2 = 10 cells).
The fully discharged voltage of a NiCd cell is 0.8V. 10 cells * 0.8V per cell = 8V.
20V charger - 8V battery = 12V difference.
12V/0.2A charge rate = 60 Ohms.
12V * 0.2A = 2.4Watt of heat that will be generated.
2.4Watts / 2 (because of AC tranformer ) = 1.6Watts.
I used a set of 6 resistors to get near my 60 ohms. This gave me about 3.0Watts of power dissipation using 0.5W resistors--Because I used an AC charger, the 3.0W capacity is more than enough, because the resistors get to rest during the negative AC half cycle. They are really only exposed to 1.6 watts.
For a DC 20V charger, the desired charge rate would have worked out to 1/16 = 0.1A and 120 Ohms. 12V * 0.1A = 1.2W. Six 1/2W resistors would probably be okay for this too, but the values would be different (120 ohms instead of 60). BE SURE TO DO YOUR OWN CALCULATIONS -- MINE ARE ONLY AN EXAMPLE and might burn your house down.
The charge indication LED should get about 0.02A max.
(12V-1.7V led forward voltage drop)=10.3V. 10.3V/0.02A = 515 Ohms. A 680 Ohm resistor would be fine. This limits the current into the LED to keep it from dying.
Test the Charging Circuit.
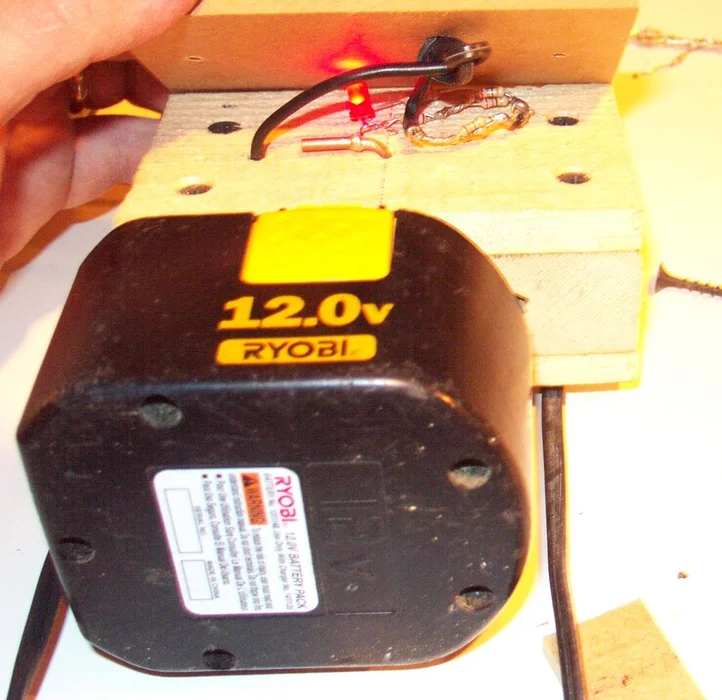
Make a cover plate to cover the electronics. Cut the wood to the same size as the sides of the battery holder. Pull the cord from the wall transformer through it to finish building your circuit. Make a knot in the cord to keep it from tugging on the circuit parts when it is being used. Place the Makita cordless drill battery into the holder and power up the circuit to test it The LED should illuminate. Take this opportunity to mark a hole for the LED in another thin piece of wood that will cover the circuit.
Add a Pair of Spacers.
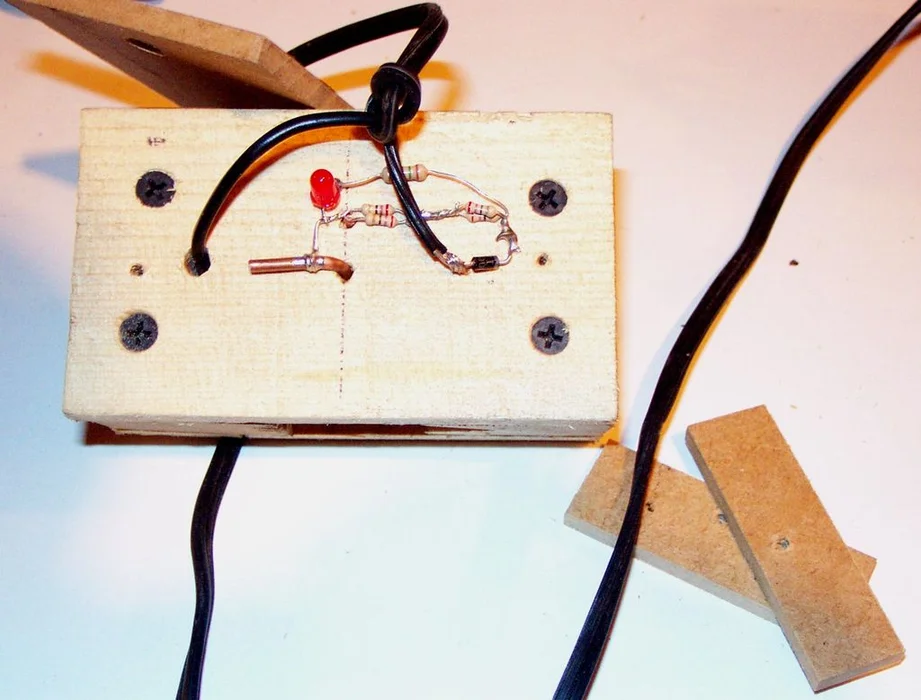
Assuming that everything has worked thus far, it is time to close it up. Cut two spacer strips to keep the cover from crushing the electronics. I used a thin piece of hardboard. Drill holes through the hard board and the spacers at the same time.
Put in the Last Screws.
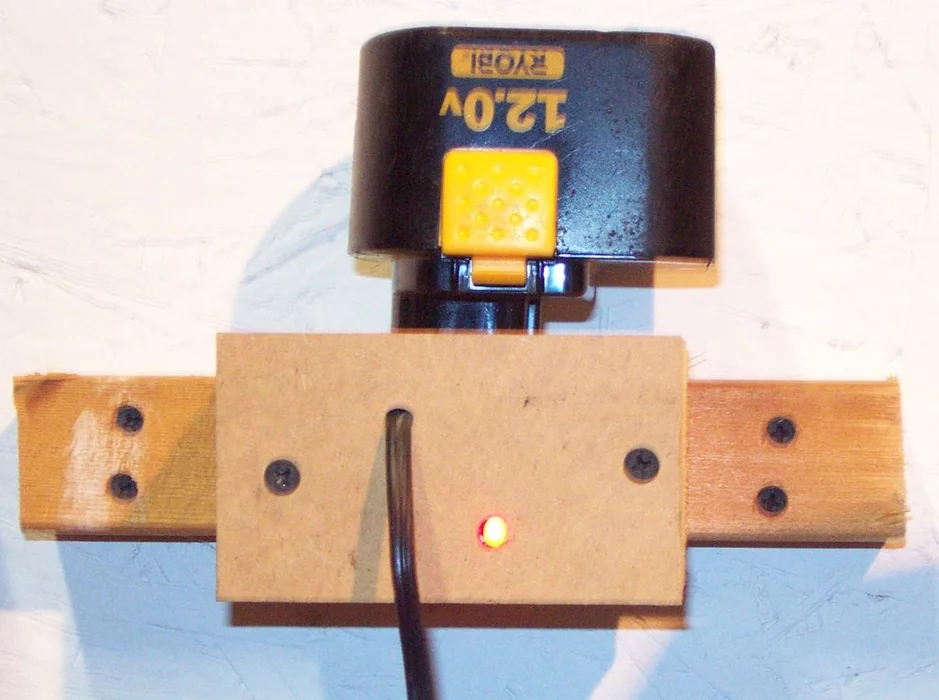
Put in the last screws and try it out. I added a strip of wood to the back of mine to allow it to be screwed to the wall next to the charger that came with my drill years ago. Now BOTH batteries will be ready when I need them.
Warm Warning: If you can't do it yourself, I suggest you buy a regular cordless drill charger.


Manufacturers' names and models are used for reference purposes only. Prices subject to change. Errors and omissions excepted. Contact centres may be monitored or recorded. © 2010-2025 All rights reserved.

